UV Channels
What are UV Channels
UV Channels in 3D software are an essential component of the texturing process in 3D modeling. They represent the method by which 2D images (textures) are applied to a 3D model. Understanding UV Channels requires a grasp of UV mapping, which is the process of projecting a 2D image onto the surface of a 3D model.
-
UV Mapping: In 3D modeling, UVs are the coordinates that determine how a texture is mapped onto a 3D object. The term “UV” refers to the axes of the 2D texture space, analogous to the X and Y axes in 3D space. UV mapping unfolds a 3D model into a 2D plane to ensure that a texture fits correctly on the model’s surface. The detailed explanation can be found in the chapter What are UVs.
-
Channels: A UV Channel is essentially a layer of UV mapping. Each channel can contain a unique UV map, allowing different textures to be applied to the same 3D model in various ways. This is particularly useful for applying complex textures or when different aspects of the model require separate texturing techniques.
For example, you might have one UV Channel for the color texture of a model, another for its bump mapping (which provides texture details like bumps and grooves), and yet another for specular mapping (which defines the shininess and reflective properties). By using multiple UV Channels, you can create more detailed and realistic textures on your 3D models without the textures interfering with each other.
In summary, UV Channels in 3D software are used to apply and manage multiple texture maps on a 3D model, allowing for greater complexity and detail in the texturing process.
Blender, Maya, Unreal …
As explained, UV channels are essentially layers of UV maps for a single 3D model. Each channel can contain a unique UV map, allowing different textures to be applied to the model in various ways.
UV channels are used when a single model requires multiple textures applied in different ways. For example, one UV channel might be used for color textures, while another could be for bump mapping or specular maps. This allows for greater flexibility and complexity in texturing.
Most 3D software supports the use of multiple UV channels for each model, allowing for diverse and complex texturing techniques. Each channel can host its own unique UV layout for specific types of textures or mapping needs.
- Unreal Engine: In Unreal, artists have access to 8 UV Channels.
- Unity Engine: Unity supports 4 UV Channels.
- Autodesk 3ds Max: A robust offering is found in 3ds Max, with up to 99 UV Channels available. This extensive range caters to highly detailed and complex texturing needs in various 3D projects.
- Maya: In Maya, these are referred to as “UV Sets.” This terminology reflects the software’s approach to managing multiple texturing layers, providing artists with a powerful tool for detailed texture mapping.
- Blender: Blender users will find this functionality under “UVMaps.” This feature integrates seamlessly with Blender’s comprehensive texturing and modeling capabilities, offering ample room for creative texturing workflows.
- Substance: As of 2025, Substance currently supports only a single UV channel. However, this limitation may change in future updates as the software evolves. When working with multiple UV channels in Unwrella-IO, keep in mind that only the very first UV Channel on the top of the UV sidebar will be accessed by Substance.
The availability and naming conventions of UV channels or sets vary across different software, but they all serve the essential purpose of enhancing the texturing process, allowing for more detailed and sophisticated 3D models.
UV channels are widely used in various fields, such as game development, film, and animation. They allow for detailed and realistic texturing of 3D models by enabling different texture effects to coexist on the same model without interfering with each other.
How to use UV Channels in Unwrella-IO
Using UV Channels in Unwrella-IO is designed to be straightforward and user-friendly, allowing you to create, manage, or remove UV Channels with ease. This simplicity enhances your production workflow, especially once you’re familiar with the concept of UV Channels.
Previewing the UV Channel
In Unwrella-IO, the UV Wireframe, assuming an UV Map exists, is subtly displayed as a background layer behind your object. This is part of Unwrella-IO’s unique Para-Viewport concept. Unlike traditional split-screen methods, Para-Viewport utilizes the three-dimensional space for layering assets and data. This approach significantly improves the resolution and clarity of both the object you’re working on and the resulting UV Wireframe.
 The Para-Viewport design in Unwrella-IO eliminates the need for manual synchronization between object polygon selections and UV data, leading to a more streamlined and uncluttered user interface. This results in a larger and more efficient viewport, optimizing the preview of your assets.
To toggle between viewing the object and its UV Map, you can simply click on the icons located at the bottom right of the interface or double-click with the right mouse button. This intuitive control scheme makes it easy to switch perspectives and manage your UV Channels effectively.
Source and Target
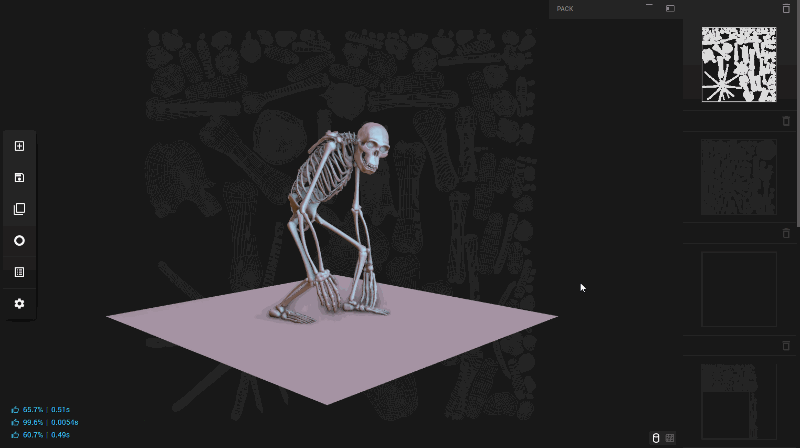
![]() In Unwrella-IO, user will find two key types of UV channels: the UV Source Channel and the UV Target Channel. These are accessible on the right side of the user interface, presented as UV Slots that you can organize according to the needs.
In Unwrella-IO, user will find two key types of UV channels: the UV Source Channel and the UV Target Channel. These are accessible on the right side of the user interface, presented as UV Slots that you can organize according to the needs.
The UV Source Channel serves as the primary channel for reading and processing UV Maps. Based on your settings, the UV data in this channel will be processed and prepared for further use. This might involve various operations such as packing or rearranging the UV layout to optimize texture space.
On the other hand, the UV Target Channel is where this processed UV data is stored. After the UV maps in the Source Channel have been processed, they are transferred to the Target Channel. This channel essentially holds the final, adjusted UV layout that you will use for your project. You have the flexibility to pack either the entire scene or selected elements into any of the available slots in this channel.
For more detailed operations like copying, swapping, mixing, and deleting UV slots, you will find comprehensive guidelines in the following chapter: “Editing UV Channels”. This section will provide step-by-step instructions to help you manage these tasks efficiently, ensuring a smooth workflow in your UV mapping process.
Adding a new UV Channel
In Unwrella-IO, users have the flexibility to work with UV Channels according to their project needs. You can choose to unwrap an pack objects using their existing UV Channel, which, in most instances, is the default UV Channel labeled as “0”. This option is useful when user wants to replace the current UV layout and simply optimize or adjust the unwrapping within the same channel.
Alternatively, if the user prefers to preserve the original UV layout, they can select a new UV channel to store the unwrap or packing solution. This approach is especially useful for experimenting with different unwrapping strategies or maintaining multiple UV layouts for various purposes, such as different texture resolutions or types. By utilizing a new UV channel, the original UV mapping remains untouched and accessible, while the newly generated results are stored separately, ensuring maximum flexibility in the workflow. This feature in Unwrella-IO provides enhanced convenience and flexibility, enabling a non-destructive workflow. Each result can be stored temporarily or permanently across different layers, allowing for seamless experimentation and iteration without losing previous versions.
To unwrap and pack UVs in a new UV Channel follow the steps:
Step 1
Start by deciding what part of your scene you want to unwrap. If you wish to unwrap the entire scene, make sure no objects are selected. This action tells the software to include everything in the unwrapping process. However, if you only want to unwrap a specific portion of your scene, select just those objects. This selection will limit the unwrapping process to the chosen objects.
Step 2
Next, you need to specify the Source Channel. This is done in the Unwrap Tab menu. Ensure that the Source Channel you select contains the unwrapped UV data that you intend to process. This step is crucial as it determines which UV data the software will use for unwrapping.
Step 3
Now, choose the Target Channel from the Unwrap Menu. This is where your newly processed and automatically unwrapped and packed UV Maps will be stored. Once you’ve selected the appropriate Target Channel, simply press the “Unwrap” button. The software will then process the UV Maps from the Source Channel and store the optimized layout in the Target Channel you selected. This functionality allows for a fast workflow, enabling you to efficiently manage and organize your UV maps for different purposes or stages of your project.
Organizing UV Channels
Unwrella-IO provides an intuitive and comprehensive set of tools for organizing and managing UV channels efficiently, like copy, delete, swap and quick-pack. These methods allow you to structure, modify, and optimize your UV layouts with ease.
Refer please to this methods in the next chapter “Editing UV Channels”: